Versions Compared

Key

  • This line was added.
  • This line was removed.
  • Formatting was changed.

...

...

Include Page
Tempo for Data Center Header
Page Properties

Question

Can I import worklogs into Tempo on

Server/DC

Data Center using a csv file?

Answer

Worklogs can be imported into Tempo using the native Jira .csv import functionality when no worklogs attributes are added to your Tempo instance. The Jira .csv import does not support Tempo worklog attributes, so if you need to import worklogs with worklog attribute values, you will need to use the Tempo API with a tool like Postman or by using the command line.

More information for the csv import options in Jira can be found in the Atlassian documentation

Before we import worklogs into Jira, we will need to prepare an Excel sheet to work with the .csv import.

Create

Create a column in your Excel sheet that holds the data in the sequence that will be used for the header row in your .csv output file. The .csv header looks like this:

code

title
CSV file header
Code Block
Project Name,Project Key,Issue Key,Summary,Worklog,Project Type

This is how the csv  file should look when opened in a spreadsheet:

Image Removed
Image Added

You will need to put the strings together separated by a “,” as it acts as the delimiter in the .csv file. The entires for the worklog  information is split into 4 sections which are separated by a ";"

  1. Worklog description

  2. Worklog date

  3. Worklog author (username)

  4. Worked seconds

The end result of the body of the .csv file should look like the example below:

Code Blocktitle

CSV file body
Code Block
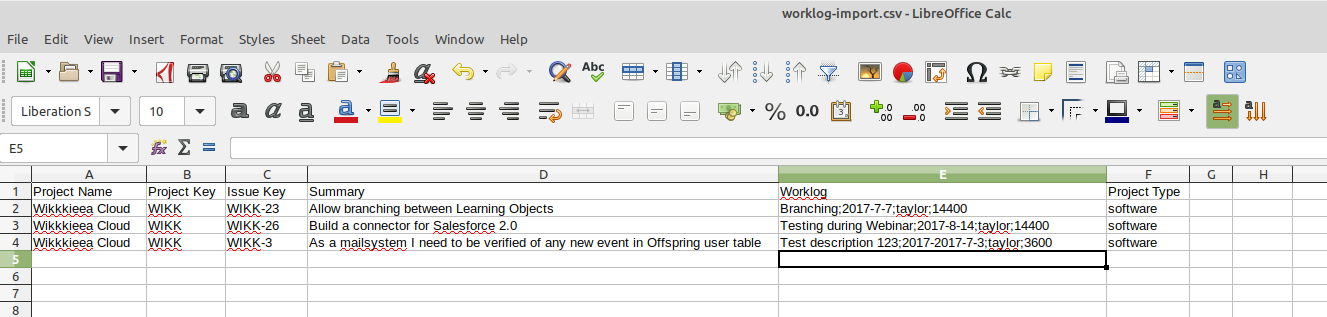
Wikkkieea Cloud,WIKK,WIKK-23,Allow branching between Learning Objects,Branching;2017-7-7;taylor;14400,software
Wikkkieea Cloud,WIKK,WIKK-26,Build a connector for Salesforce Force 2.0,Testing during the webinar;2017-8-14;taylor;14400,software
Wikkkieea Cloud,WIKK,WIKK-3,As a mailsystem I need to be verified of any new event in Offspring user table,Test description 123;2017-7-3;taylor;14400,software

Now

we navigate to

we navigate to our JIRA instance to the CSV Import Wizard.

 Select

 Select the .csv file that has just been created and ensure that the appropriate encoding and delimiter have been selected.

Image Removed
Image Added

Map the projects according to values in the .csv file, and select the date format used in the .csv file.

Image Removed
Image Added

Select the mapping values in the “Fields” step of the import wizard

Image Removed
Image Added

You can now import the data. When you have done everything correctly, you will see a message on your screen that confirms the successful import of the worklogs.