| Warning |
|---|
Our Cloud Help Center has a new home at https://help.tempo.io/cloud/
We will no longer be updating Cloud documentation in this space, so please be sure to check the new site for the latest documentation and learning content. |
| Info |
|---|
|
You can change existing plans in these ways:
Editing plan details, such as the Jira issue or project, dates, duration, and more
Changing the plan’s duration
Moving a plan to another day or to another resource
Copying plans to another day or to another resource
- Splitting plans
Deleting plans
To access Resource Planning:
- Select Planning
in the Tempo sidebar.
In the Resources panel on the left, click the arrow > beside a resource to expand their plans. You can also expand the plans of all users by clicking the Expand all arrow at the top of the resource list. See Viewing Resources and Their Plans /wiki/spaces/THCARCHIVE/pages/373490467 for more information.
Editing a Plan's Details
Using the Edit Plan form, you can make any type of change to a plan - select a different Jira issue or project, change the date and time, the amount of time planned, and even assign the plan to a different user.
In the Days or Weeks view:
- Click the plan you want to edit.
- Make the changes in the Edit Plan form, which is essentially the same as the Plan Time form.
- Click Update to confirm the changes.
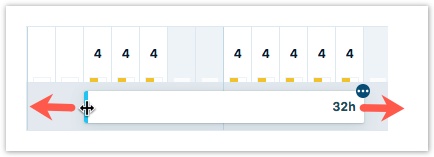
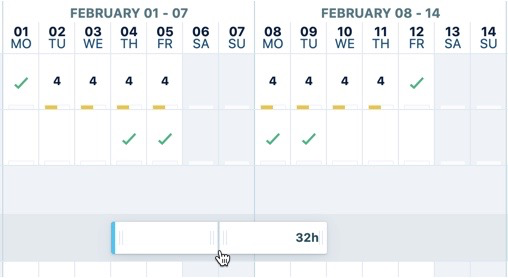
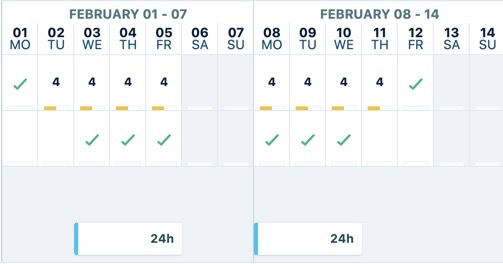
Changing a plan’s duration
In the Weeks view:
- Drag either end of a plan to change the duration interactively, or change the start Date and End Date in the Edit Plan form.
| Info |
|---|
Plans in the Weeks view are sorted by their start date per resource. When you change the start date, the plans are automatically reordered so that the plan with the earliest start date is at the top for the resource. You cannot currently sort the plans in any other way. |
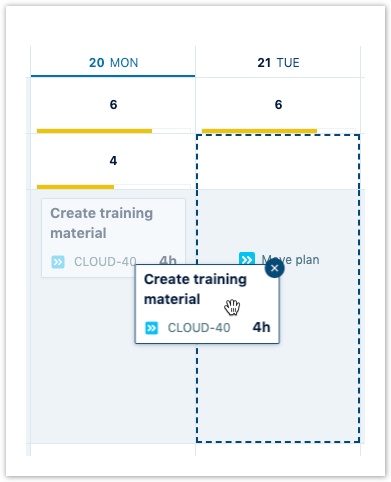
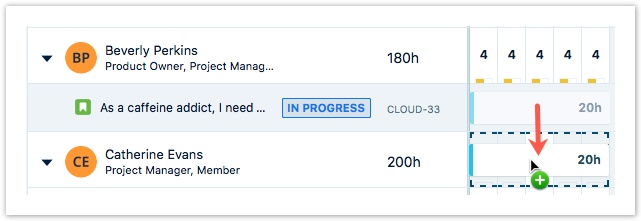
Moving Plans
You can move a plan to another date, or move it to another resource to manage the workload among team members. You can do this interactively in either the Days or Weeks view, or change the start Date and/or End Date, or select a different Resource, in the Edit Plan form.
| Info |
|---|
While sorting resources is configurable, sorting the issues by plan start date is not. |
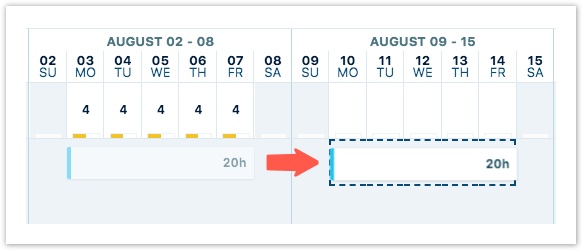
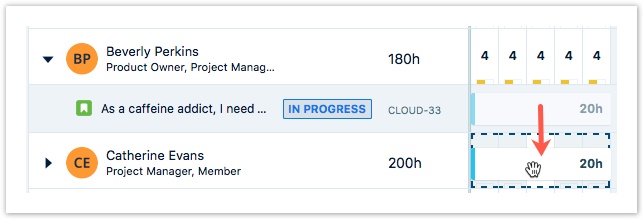
In the Weeks view:
- Drag and drop the plan to the different date.
- Drag and drop the plan to a different resource. This is an easy way to manage the workload among team members. Remember that you need the View Plans and Manage Plans permissions for the team to be able to do this.
In the Days view:
- Drag and drop the plan to a different day.
- When dragging a plan that is a part of a period plan, only the plan for that day is moved. To move the whole period, click the plan and change the change the start Date and/or End Date for the period in the Edit Plan form.
- To move the plan to another resource, click the plan and select a different Resource in the Edit Plan form.
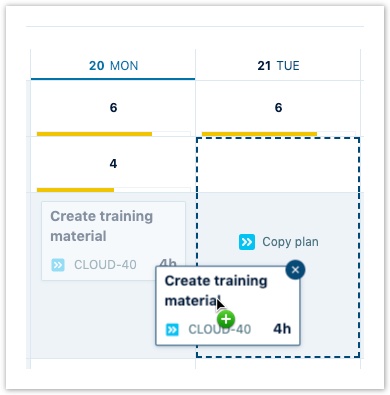
Copying Plans
You can copy a plan to another date, or copy it to another resource to manage the workload among team members.
In the Days or Weeks view:
Press the Ctrl (Windows) or Command (Mac) key as you drag the plan to a new date.
- In the Days view, when copying a plan that is a part of a period plan, only the plan for that day is copied, not the whole period.
- In the Weeks view, you can copy the plan to another resource by pressing the Ctrl (Windows) or Command (Mac) key and dragging the plan to their timeline.
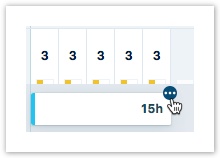
Splitting plans
After you've created a plan, you may need to divide it for many reasons. For example, if you’ve made plans that span weekends or days off, you can split the plan, then drag the ends of each new plan so that it doesn’t cover the weekend.
In the Weeks view:
Click the (...) in the right corner of a plan and select Split, or press Ctrl (Windows) or Command (Mac users).
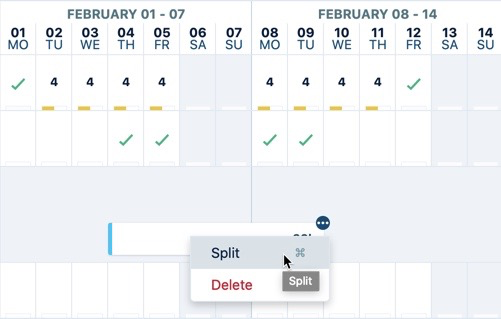
Move the divider over the plan and click where you want to split it.
Now you can modify each plan independently, such as dragging its ends to change its duration, or moving each plan to different dates or resources.
Info You can split imported plans.
You can split a plan even if it’s in progress.
If you split a plan that’s already been approved, they are resubmitted to the reviewer for approval and the plan status returns to Pending.
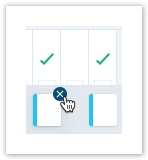
Deleting Plans
You can delete plans that are no longer relevant. This removes them from the Resource Planning view, but doesn't affect the Jira issue on which time is planned.
In the Weeks view:
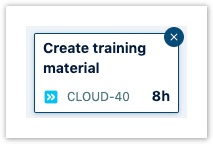
- For a single plan, click the x in a plan's right corner. In the Delete Plan dialog box that appears, click Delete to confirm.
- For a period plan, click the (...) in a plan’s right corner and select Delete. In the Delete Plan dialog box that appears, click Delete to confirm.
In the Days view:
For any type of plan, click the x in a plan's right corner.
In the Delete Plan dialog box that appears:
- For a single-day plan, click Delete to confirm.
- For a period plan, choose to delete only the plan for the selected date, or delete the whole period plan, then click Delete to confirm.
Related Topics
- Viewing Resources and Their Plans - Tempo Cloud
- Planning Time for Resources - Tempo Cloud
- Filtering the Resources - Tempo Cloud
- Approving Plans - Tempo Cloud/wiki/spaces/THCARCHIVE/pages/373490467
- /wiki/spaces/THCARCHIVE/pages/375095525
- /wiki/spaces/THCARCHIVE/pages/194183172
- /wiki/spaces/THCARCHIVE/pages/1349845118
| Panel | ||||
|---|---|---|---|---|
| ||||
|