Creating plans
On the team members timeline, you can create a plan for a team member or for the whole team to work on an issue, project, version, component, or sprint.
Required permission
Plan Time permission for the team
Procedure
To create a plan, complete the following steps:
On the team members timeline, click and drag the cursor across days in the row of the team member that you want to plan work for.
The 'Create plan' sidebar opens to the right of the timeline.
Fill in the requested information on the 'Create plan' sidebar. The sidebar contains the following fields:
Planned for
- This field is automatically filled with the name of the team member whose row you clicked or the name of the team if you clicked the top row.
- Planning time for a team member to work on an issue is not the same as assigning the issue to the team member. Only one person can be assigned to an issue at any time whereas you can plan time for more than one team member to work on the same issue simultaneously.
Plan item type
You can plan work on an issue, project, version, or component. If JIRA Agile is installed, you can plan work on a sprint.
Plan item
To search for a plan item, start typing in the field. The available items are those of the type that you selected in the Plan item type field.
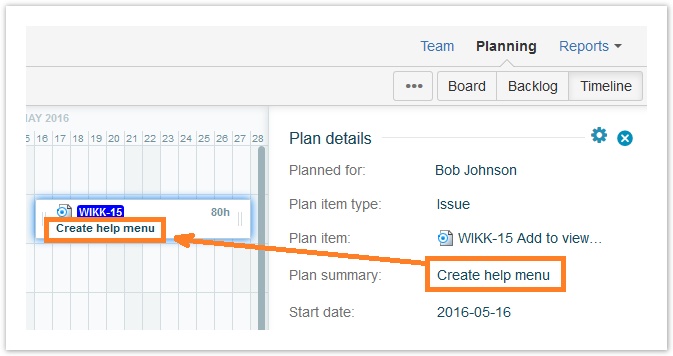
Plan summary
- If a plan has a plan summary, the plan summary is displayed beneath the plan item key on the plan on the timeline.
- If a plan does not have a plan summary, the plan item summary or description is displayed on the timeline instead, as explained in the following table:
| Plan summary | Plan item type | Displayed on plan on timeline, beneath plan item key |
|---|---|---|
| None | Issue | The issue summary |
| Project | The project description | |
| Version | The version description | |
| Component | The component description | |
| Sprint | Nothing |
Status
Start and end dates
These fields define the period that the plan covers and are automatically filled with the dates that you selected on the timeline.
Planned time
Even if the availability of team members to work on the team is less than 100% of their time, planned time can still be for 100%.
Example: Erica works 8 hours a day. She is in two teams, with 50% availability for each team. You see that no work is planned for Erica in her other team so you create a plan for 100% availability instead of 50%. All of Erica's 8 hours go into the plan.
Repeat and Until
If you set the plan to be repeated weekly, every two weeks, or monthly, the Until field is displayed. In the Until field, specify the last possible start date of a plan in the series.
- Click Save.
The plan is created on the timeline, and the 'Plan details' sidebar is displayed. The 'Plan details' sidebar contains information about the plan and about the associated plan item.
Tempo Timesheets for Server Documentation
For the newest version of Tempo Planner documentation, please visit our Help Center. For support, see our Support Portal.