This page explains describes the Plan Time window used for Time Planning. The window is opened by clicking the from the User Timesheet, and certain other views. Simply click the Plan Time button in the timesheet sub-header navigation or on any other screen where it is present.
The Plan Time button in the timesheet sub-header navigation (click to enlarge)

The Plan Time window has an orange header to differentiate it from the Logging Work from a timesheet. The left sidebar has default the options Issue and activities Project, Version and Component. If an Internal Activity has been configured the Internal tab becomes available.
Plan on Issue
The first option for planning is Issue where you can plan time on a JIRA issue. The User field lists users who you can plan time for. You can plan time for users who are in teams in which you are the team lead or for which you have Plan Time permission.
The Plan Time window showing the Issue option in the side menu (click to enlarge)
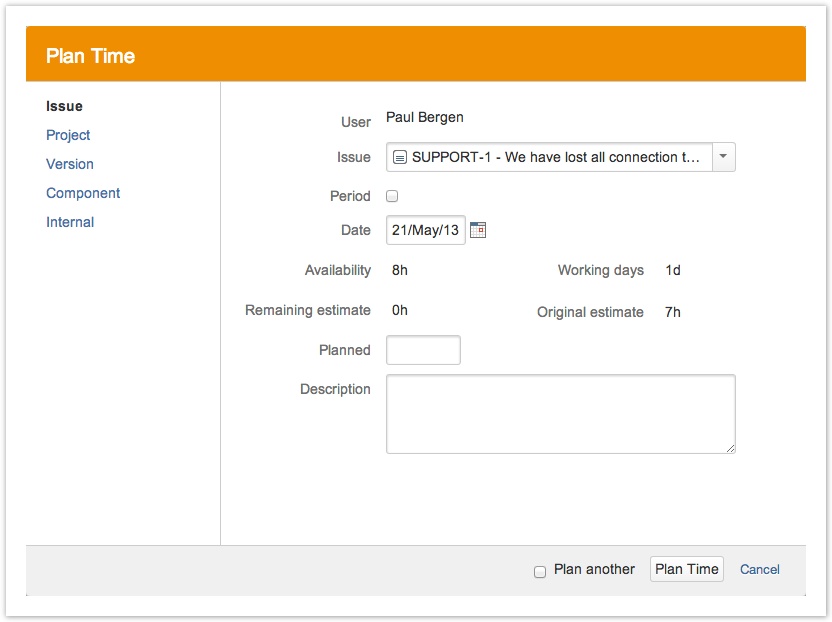
To plan time on an issue, follow the steps below:
- Once you have opened the window, select the Issue option on Select Issue from the left sidebar.
 The last option that was used, is selected by default.
 - Choose an issue from the drop-down in the Issue field (you can also start writingtyping).
- If you tick check the Period box, an End date field for the time period is displayed.
- Select a new a Date (and End date) if you are planning on another date than the current one. Availability (Working days) is displayed below the date in the window. These numbers reflect the users workload schemes and holiday schemes, and if some plans have been done previously on her/him for the date.Fill a number into the field Planned for the hours to be planned on the issue the user has other planned time for that date.
- Enter the number of hours in the Planned field (if period is chosen, the field is called Plan per day). Remaining estimate and Original estimate are displayed above for information purposes only, e.g. it doesn't make sense to plan more than the original estimate indicates.
- Write Type a brief description in the Description field, if desired. The description is optional and can therefore be omitted.
- Click the Click Plan Time button if you are done planning or Cancel to close without saving. You can also continue to plan , by ticking checking the Plan another box before your click the Plan Time button, but this means that the . The window stays open to do a new plan time entry.
Issue Planning from Action list
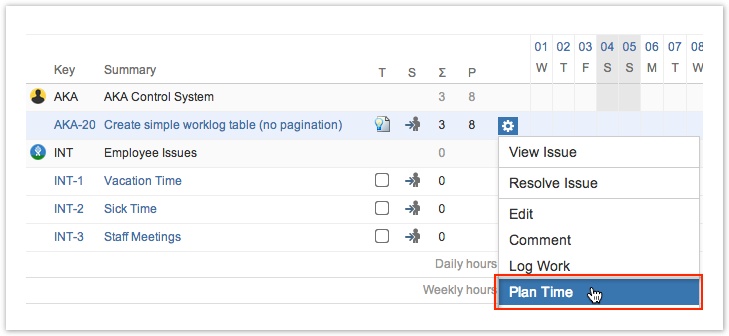
The plan time window can be opened from the User timesheet, by selecting the Plan Time option in the Actions list for an issue in the timesheet.
The Plan Time options in the Actions menu for the AKA-20 issue in the user timesheet
Other Options
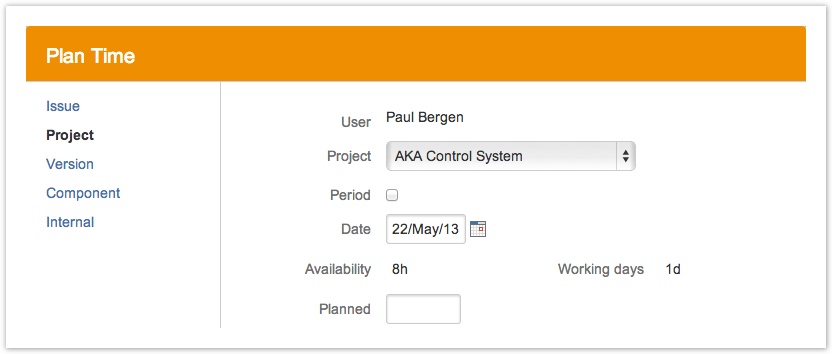
As mentioned above it is also possible to plan on activities or Project, Version and Component, and if an Internal Activity has been configured the Internal tab becomes available. The plan time window for these other options, does not display Remaining estimate and Original estimate, since they are associated with issues. The screenshots below show the difference for each option.
Planning time on Project (choose a project from the drop-down; click to enlarge)
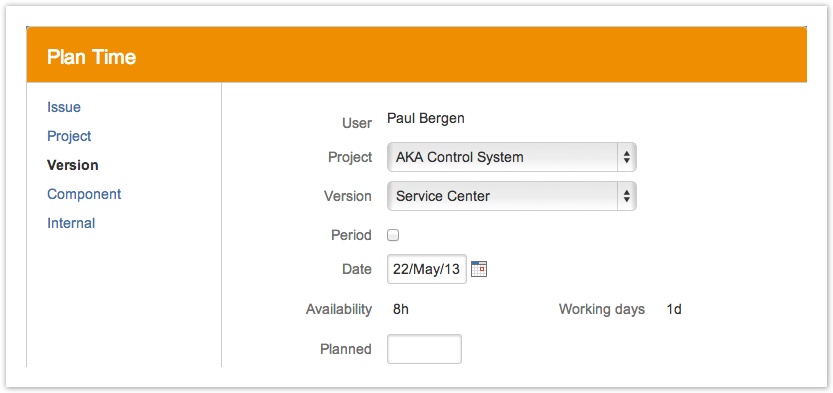
Planning time on Version (choose a project and a version of it from the drop-downs)
Planning time on Component (choose a project and a component of it from the drop-downs)

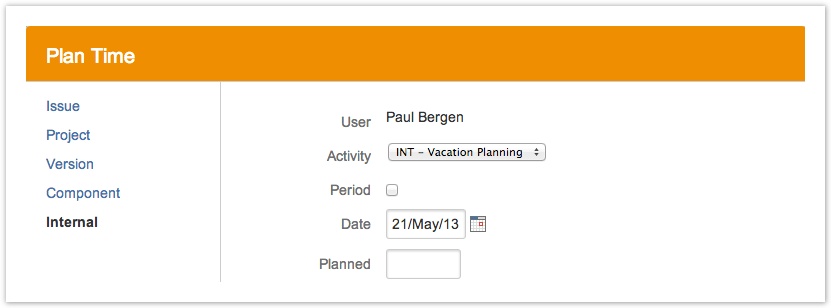
Planning time on Internal (choose a pre-defined activity from the drop-down)
| Panel | ||||||
|---|---|---|---|---|---|---|
| ||||||
|
| Panel | ||||
|---|---|---|---|---|
| ||||
|