Request Approval
This page explains the Request Approval workflow process for planned time. In order for this approval process to work, it needs to be set in /wiki/spaces/TEMPO/pages/365200071.
The Labs' Plan Workflow option in the Global Configuration

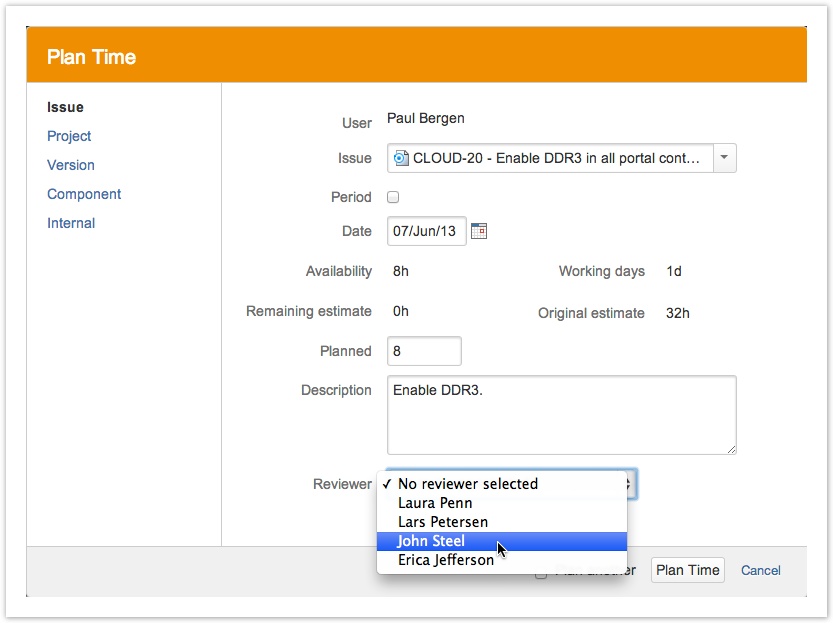
When this option is enabled, a user can request a plan s/he has made to be approved or rejected by a reviewer (Team Lead or a user with Approve Timesheet permission). The screenshot below shows a Reviewer being selected in the Plan Time window and the text entered in the Description field becomes a message to the reviewer.
![]() User can not select own name as reviewer.
User can not select own name as reviewer.
If only one user has Approve Timesheet permission nothing is displayed in the reviewer list for that user.
Selecting a Reviewer for a planned issue (click to enlarge)
If Paul and John have configured the Tempo activity stream provider, this activity will be displayed in their dashboards.
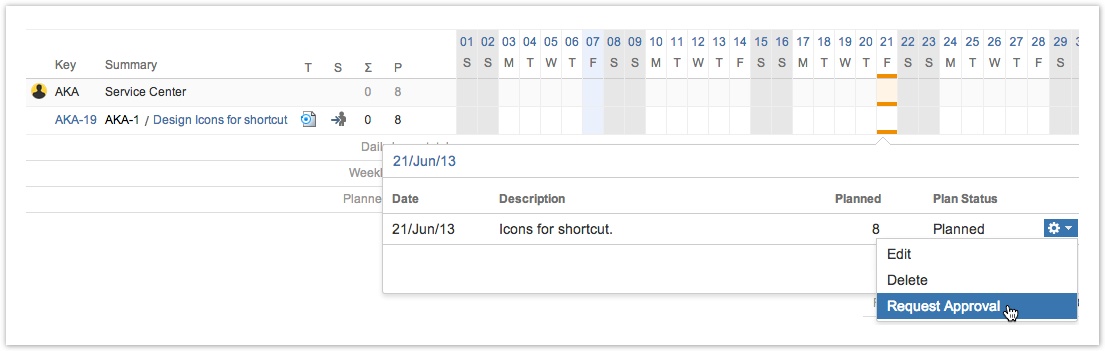
The Reviewer can also be selected from the in-line edit dialog. Clicking on the planned Timesheet Cell and choose the Request Approval action option, which opens the Request Approval dialog to select the reviewer.
Selecting Request Approval option from the Actions menu, in the in-line edit dialog (click to enlarge)
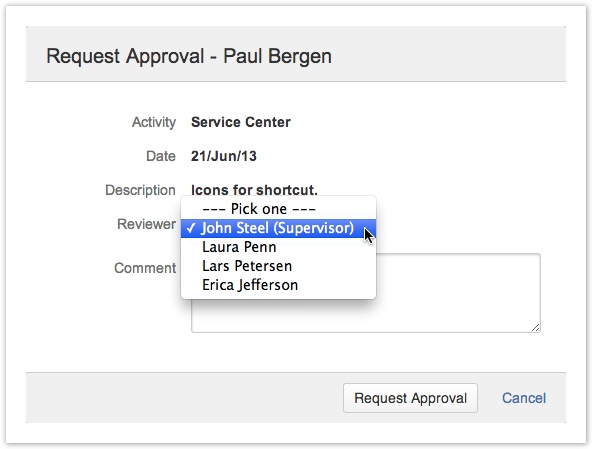
The Request Approval dialog (click to enlarge)
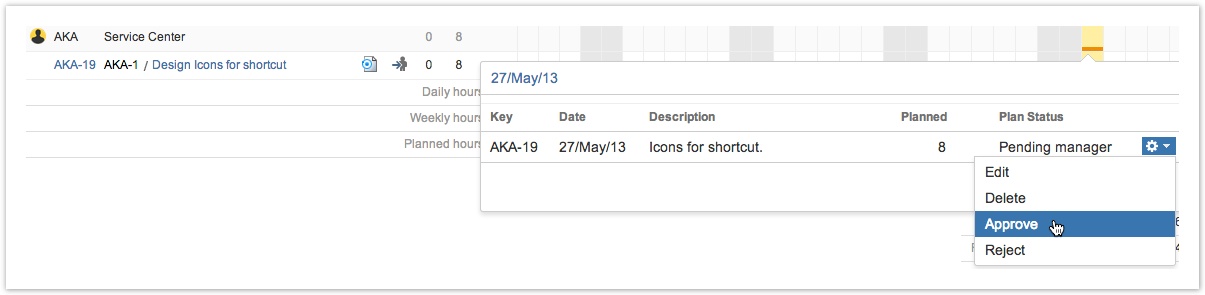
Since John is now the reviewer for this planned item, the actions menu in the in-line edit dialog for him, has now the options Approve and Reject.
The Approve and Reject options in John's Actions menu (click to enlarge)
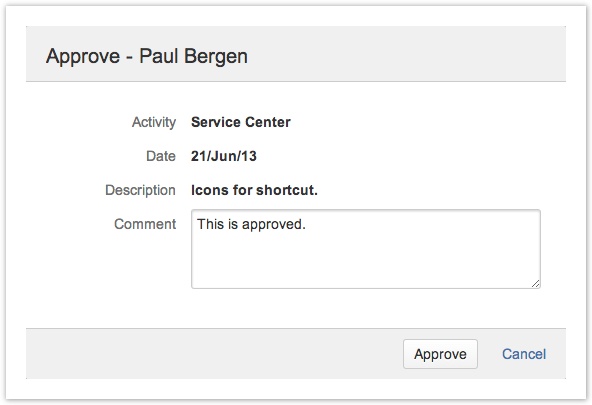
The Approve dialog (click to enlarge)
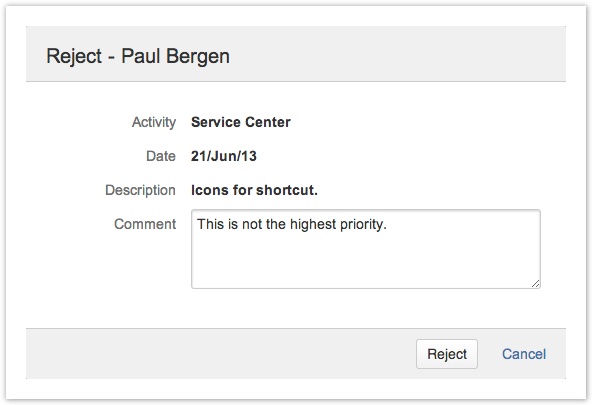
The Reject dialog (click to enlarge)
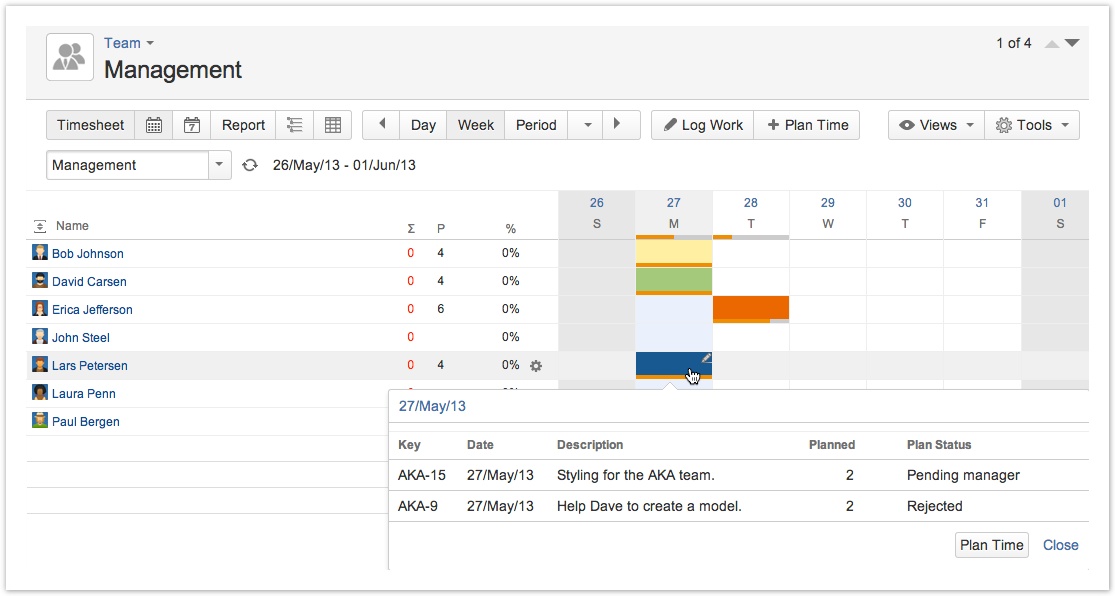
The statues for planned items are displayed with different background colours in the Timesheet cells. Planned items that do not have any statuses yet are displayed with orange bars at the bottom in the timesheet cells.
When a reviewer has been selected the background colour becomes light yellow-orange for the planned item. Once the item has been approved, the background colour changes to green. Other statues are shown in the table and screenshot below.
Table: Statues for planned items
| Background colour | Status of a Planned Item |
|---|---|
| None | A reviewer has not been selected |
| Light yellow-orange | Pending Manager |
| Green | Approved |
| Dark orange | Rejected |
| Blue | More than one statuses for the selected item |
Statues for planned items shown in the Team Timesheet