Staff Member Operations
- Hildur Nanna Eiríksdóttir (Deactivated)
- Jaramy Conners
Using Tempo Teams
You can use Tempo Teams to compose the Folio's Staff. This is the centralized way of maintaining the composition of the Staff and the easiest way to reuse staff from Folio to Folio. See the documentation on managing Tempo Teams inside a Folio to learn more.
Importing Staff Members
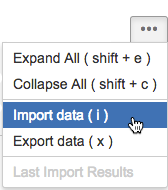
You have two options when importing staff members information. You can either import the staff from another Folio or import from an external source via a CSV file. To import a staff members, click on the ... button or type the keyboard shortcut i to open the import dialog. Select the import option you prefer in the import dialog.
Importing Staff Members from another Folio
Select the Folio to Folio option in the Select Import Type dialog to import the staff of another folio. This brings up the Import Staff from Folio dialog.
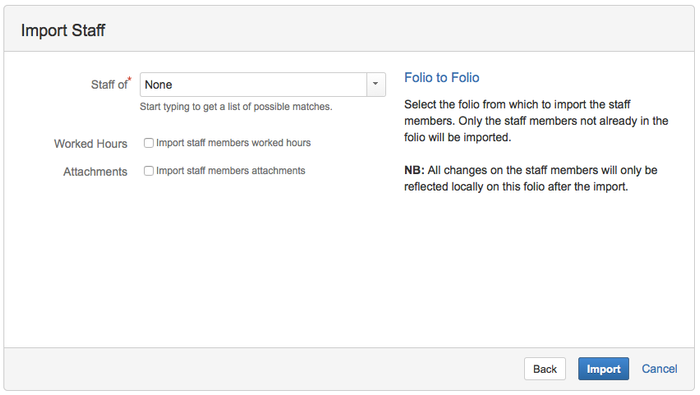
Select the Folio from which to import all the staff members with their wages and availability information. Worked hours and attachments are not imported by default, but you can choose to import them by checking the appropriate options.
Members already in the destination Folio and unfulfilled positions are not imported.
Only the Staff of the Folios you can view can be imported. Refer to the Folio visibility configuration for more information.
Importing Staff Members from CSV
Select the Import External Data option in the Select Import Type dialog to import staff members from a CSV file. This brings up the Import Staff from CSV dialog. See Importing Data from CSV and Staff Member Import to learn more about importing Staff members.
Exporting Staff Members to CSV
To export data to an external CSV file click on the ... button and select Export data. Alternatively, you can type the keyboard shortcut x to instantly export the data. See Staff Members CSV Export to learn more about the exported data.
Adding a Staff Member
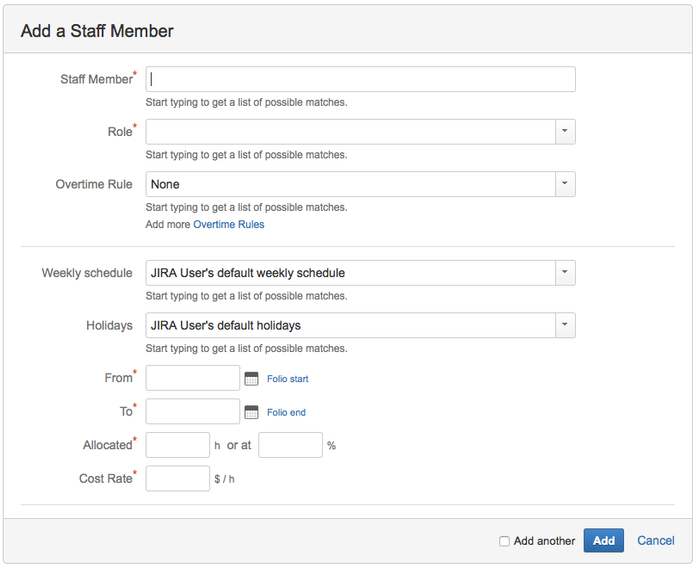
To add a staff member, either click the Add a Staff Member button in the upper right corner of the Staff browser or hit the a (for add) shortcut key.
| Required Parameters | |
|---|---|
| Staff Member | JIRA user to associate with that staff position. Note that it can be a none JIRA user. |
| Role | Role of the resource within the Folio's staff. The list of valid roles is configured by JIRA administrators at the add-on level under Tempo Teams > Team Roles. |
| Overtime Rule | Overtime rule to apply to the member. |
| Weekly Schedule | Weekly Schedule of the staff member. Refers to a Tempo Workload Scheme indicating the number of normal working hours per weekday for that person. Workload Schemes can be defined at various levels, namely:Tempo Team member, JIRA user, Folio, Global Folio Configuration, Overall Default. |
| Holidays | Holidays of the staff member. Refers to a Tempo Holiday Scheme. Holiday Schemes can be defined at various levels, namely: Tempo Team member, JIRA user, Folio, Global Folio Configuration, Overall Default. |
| From | Date on which the member starts or started working on the Folio's issues (a.k.a Folio Scope) |
| To | Date until which the member finished or is planned to finish working on the Folio's issues. |
| Allocated | Number of hours and percentage or normal work hours the member is planned to be working on the Folio's issues. Both numbers are automatically maintained consistent: when a value is modified, the other one is updated accordingly. Must be between 0 and 100 |
| Cost rate | Cost per hour incurred by the member. If the Folio is Using User Rates, then no input can be provided for this field as in this case cost rates will be taken from the global User cost rates table. |
| Custom Field | Custom field(s) specified in the Folio Configuration, if any. Example: Employee number |
| Optional Parameters | |
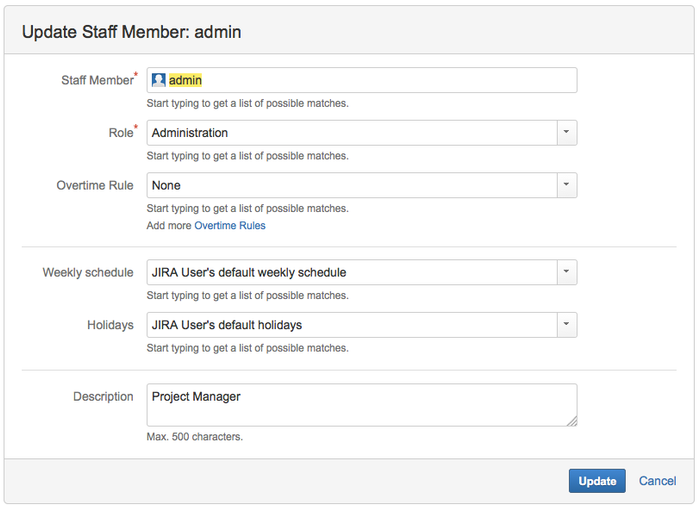
| Description | A short description of the member or the unfulfilled position. Maximum of 500 characters |
Editing a Staff Member
To edit a staff member, select the member in the staff browser and then either select the Edit menu item from the ... menu located in the member details panel or hit the e (for edit) shortcut key.
The cost rates, availability and worked hours can be edited directly in their respective tables in the staff member details panel. Click on the staff member's row in the staff browser to display the member details panel.
Deleting Staff Members
To remove one or more staff members, select the members in the staff browser and then either select the Delete menu item from the ... menu of the member details panel or hit the d (for delete) shortcut key.
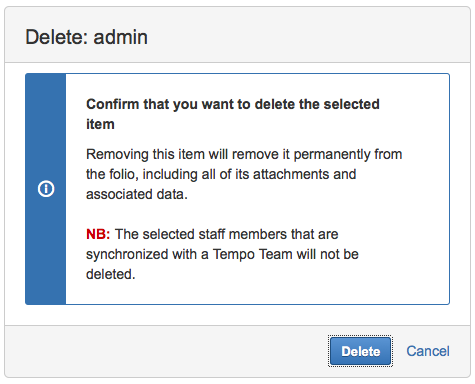
Deleting a staff member does not delete the user from JIRA. It only removes the member from the Folio's staff.
Deleting members will remove them permanently from the Folio, including all of their attachments, cost rates, availability and manually entered worked hours.
Attaching Files to a Staff Member
You can attach files to a staff member in order to keep related documents handy (payslips, resumes, etc.). To attach files to a staff member, select the member and then click the Attach Files button in details panel on the right. This brings up a dialog where you can pick a file (or multiple files simultaneously, if your browser allows it) and enter an optional comment.
Tempo Budgets records all changes that occur on Folios and their data for auditing purpose. When an expense, revenue or staff member is selected, the details panel shows a History sub section, quickly accessible by clicking the corresponding icon (![]() ) in the details panel's navigation bar. The History section displays a table listing all changes that occurred on the selected item and their associated data, such as attachments, wages, availability and worked hours. Changes displayed include creations, updates and deletions and are sorted from the most recent to the oldest. An update is recorded for each modified field, so a single edition of an Expense can possibly add many rows in the History table. Also, if the table holds more than five entries, then some entries will be hidden by default: click the row showing ellipses (...) to expand the table and show all changes.
) in the details panel's navigation bar. The History section displays a table listing all changes that occurred on the selected item and their associated data, such as attachments, wages, availability and worked hours. Changes displayed include creations, updates and deletions and are sorted from the most recent to the oldest. An update is recorded for each modified field, so a single edition of an Expense can possibly add many rows in the History table. Also, if the table holds more than five entries, then some entries will be hidden by default: click the row showing ellipses (...) to expand the table and show all changes.
The History section is visible only to users who can edit the Folio, a.k.a Folio administrators.
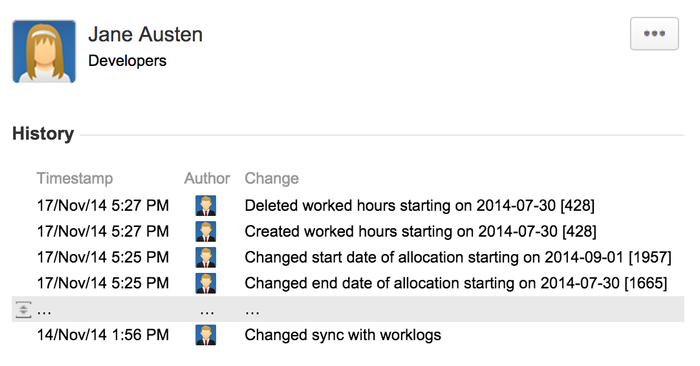
| Timestamp | Date and time at which the change occurred. |
|---|---|
| Author | Avatar of the JIRA user who performed the change. Hovering the avatar brings up a tooltip with more info on the user. Clicking it takes you to the user's page. |
| Change | Description of the change. It ends with the database ID of the modified item between square brackets. Hovering the description of updates brings up a tooltip showing the value before and after the change. |
Searching for a Staff Member
You can search for staff members by their name using the search box located at the top left of the screen.